
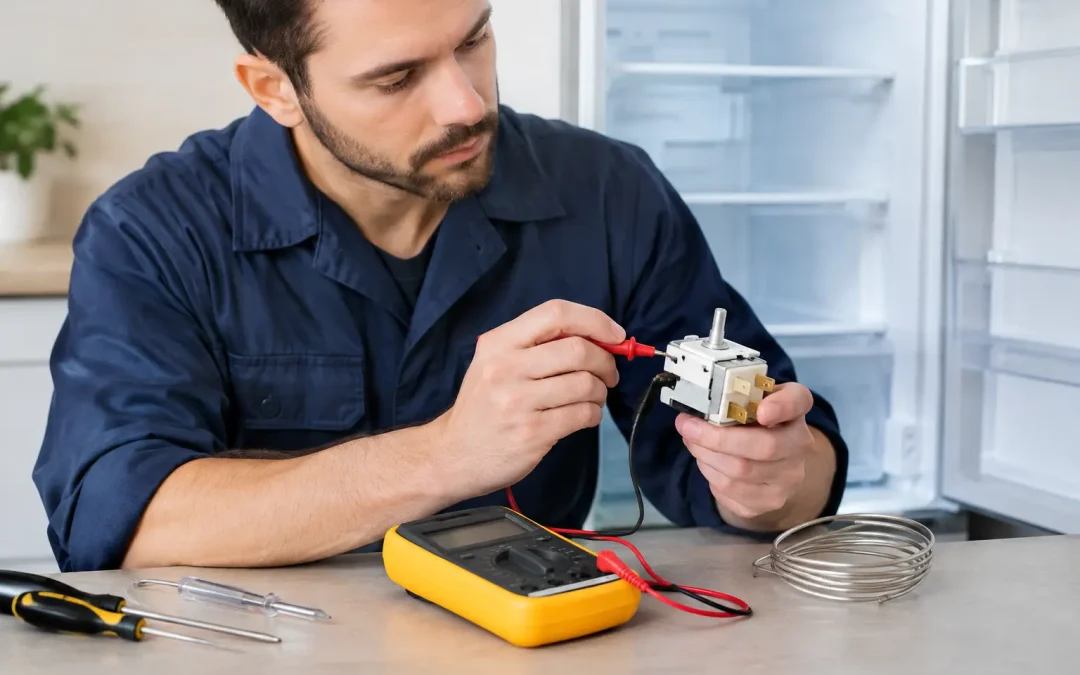
A refrigerator that runs constantly, freezes fresh food, or lets the milk warm up can point to a temperature-control problem. Knowing how to test refrigerator thermostat operation can help you describe the issue accurately, but on a premium built-in unit, the test must begin with identifying which type of control the appliance actually uses.
Many older refrigerators use a mechanical thermostat, sometimes called a cold-control switch. Many modern Sub-Zero, Viking, GE Monogram, KitchenAid, and integrated systems use electronic sensors, control boards, or brand-specific temperature-management systems instead. A continuity test that makes sense for a mechanical control can be misleading – or risky – on an electronically controlled refrigerator.
Start With the Symptoms, Not the Thermostat
A thermostat is only one part of the cooling system. Before removing panels or reaching for a multimeter, observe what the refrigerator is doing over a full cooling cycle. Make sure doors are closing completely, vents are not blocked by food containers, and the condenser area is reasonably clean.
A mechanical thermostat becomes more suspect when the compressor does not start even though the cabinet is warm, when it runs continuously and freezes items in the refrigerator compartment, or when turning the temperature dial produces no audible click and no change in operation. Those signs are useful, but they are not proof. A failed fan motor, dirty condenser, defrost problem, door-gasket leak, relay issue, or electronic control fault can create similar symptoms.
For built-in refrigeration, allow adequate time for the cabinet to stabilize before diagnosing. These systems have tightly integrated airflow paths, longer cooling cycles, and components that may continue operating after a door is opened. A quick temperature reading immediately after loading groceries is not a meaningful thermostat test.
Identify Your Refrigerator’s Temperature Control
Look at the user controls and model information before attempting any test. A simple numbered dial located in the fresh-food compartment often indicates a mechanical thermostat. A digital display, touch controls, diagnostic menu, electronic setpoint display, or separate zone controls usually indicate an electronic system.
Some premium units combine electronic controls with thermistors, which are sensors that change electrical resistance as temperature changes. Others use multiple sensors and a main control board to manage the compressor, evaporator fan, defrost function, and alarms. In those designs, there may be no conventional thermostat to test with a basic continuity check.
If you own a built-in or integrated refrigerator, locate the model and serial number before proceeding. Component locations vary substantially by product series, and access can involve grille assemblies, trim, concealed fasteners, or panels that should not be forced. A factory-trained technician uses the model-specific wiring information and diagnostic procedure rather than assuming one layout applies to every refrigerator.
How to Test Refrigerator Thermostat With Basic Checks
If your appliance has a clearly identifiable mechanical temperature dial, start with a noninvasive check. Set the control to its warmest setting, then slowly turn it toward colder while listening closely. In a quiet kitchen, a functioning mechanical thermostat often makes a distinct click as its internal contacts open or close.
That click alone does not confirm that the thermostat is working correctly, but its absence can be telling when the refrigerator is warm and should be calling for cooling. Repeat the check after the cabinet has had time to change temperature. A thermostat can click and still have worn or burned contacts, so this is best treated as an observation rather than a final diagnosis.
Use an appliance thermometer to verify actual cabinet temperature rather than relying on the dial position. Place it in a glass of water in the fresh-food section and allow it to sit for several hours with normal door use. Most refrigerators should maintain approximately 37 to 40 degrees Fahrenheit in the fresh-food compartment. Freezer performance is generally measured near 0 degrees Fahrenheit.
If the dial says cold but the refrigerator stays warm, or if a moderate setting freezes food, record the temperature, setting, and timing. This information is highly useful when arranging service, especially if the issue is intermittent.
Testing a Mechanical Thermostat With a Multimeter
A multimeter continuity test is appropriate only after you have confirmed that the refrigerator uses a mechanical thermostat and you can safely access it. Disconnect power at the outlet before removing any cover or disconnecting wires. Never test continuity on a live circuit.
The control is commonly located behind the temperature dial or control housing. Take a clear photo of the wire positions before disconnecting anything. Some terminals and connectors appear similar, and reconnecting a wire incorrectly can cause further problems.
Set the multimeter to continuity or the lowest resistance setting. With the thermostat dial set to its coldest position, the contacts should typically show continuity when the sensing bulb is warm enough to call for cooling. Turn the dial toward its warmest or off position. The contacts should normally open, showing no continuity or very high resistance.
For a more meaningful test, the sensing bulb must experience a temperature change. Depending on the control design, cooling the sensing bulb may open the contacts while warming it closes them, or the reverse may apply based on the test setup and control position. This is why generic online instructions can be unreliable. Consult the correct technical information for the exact component rather than judging failure from one meter reading.
Do not cut, kink, puncture, or sharply bend the thermostat capillary tube. This small tube is part of the control assembly. Damage to it means the thermostat must be replaced, and cramped built-in control areas leave little margin for error.
Why Bypassing the Thermostat Is Not a Good Test
You may find advice suggesting that you join thermostat wires together to see whether the compressor starts. That shortcut is not recommended for a premium refrigerator. It can cause the compressor to run without proper temperature control, bypass safety logic, create a risk of wiring damage, or complicate diagnosis if another component is actually at fault.
The risk is greater on electronically controlled and built-in appliances. A wire that resembles a simple thermostat connection may be part of a low-voltage sensor circuit or a control-board harness. Applying an old-fashioned jumper test to the wrong circuit can damage an expensive board or generate fault conditions that require additional service work.
A qualified technician can test the control circuit while accounting for compressor protection, relays, sensors, fans, defrost operation, and the manufacturer’s diagnostic sequence. That approach protects both the appliance and its warranty value.
When the Problem May Be a Sensor or Control Board
On electronic models, temperature complaints are often traced to a thermistor, control board, display module, fan system, or airflow restriction rather than a thermostat. A sensor may report an incorrect temperature even when the cabinet feels cold. A control board may fail to respond to a sensor that is working properly. The symptoms can overlap.
Watch for an error message, flashing display, temperature alarm, repeated clicking, unusual fan behavior, or a compressor that starts and stops frequently. These are reasons to avoid trial-and-error parts replacement. Replacing a sensor without confirming its resistance range, wiring integrity, and control-board response can leave the original problem unresolved.
Wine storage units deserve particular care. Their narrow temperature ranges and humidity-sensitive environments mean that even a small control error can affect a valuable collection. Ice machines also use specialized sensing and safety systems that should not be treated like a standard refrigerator thermostat.
When to Schedule Professional Refrigerator Service
Schedule service promptly if food temperatures are unsafe, the unit is overheating, the compressor runs continuously, frost is accumulating unexpectedly, or the refrigerator has an electronic display or integrated control system. Call sooner rather than later if the appliance is built in, because restricted ventilation and concealed installation details can turn a minor operating issue into a larger one.
For New Jersey homeowners with Sub-Zero and other high-end refrigeration systems, Fridge Fix provides specialized diagnostics informed by factory-certified experience and decades of focused refrigerator service. Bringing the model number, observed temperatures, and a clear description of the symptoms helps the service visit begin with useful evidence rather than guesswork.
A refrigerator should protect the food, wine, and routines your kitchen was designed to support. If the temperature control does not respond predictably, stop short of improvised bypasses and have the system evaluated with the care a premium built-in appliance deserves.